
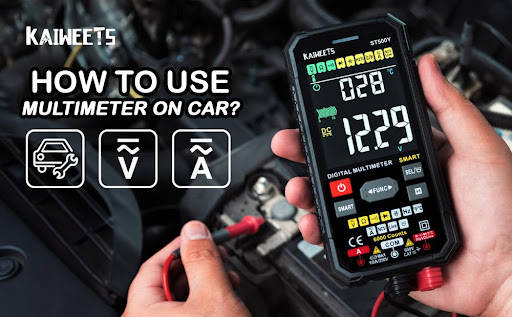
To use an automotive digital multimeter, connect the probes to the meter, then select the appropriate test function. Measure voltage, current, or resistance as needed.
An automotive digital multimeter is an essential tool for diagnosing and troubleshooting vehicle electrical systems. This versatile device can measure voltage, current, and resistance, helping identify issues such as battery problems, faulty alternators, or bad wiring. With its easy-to-read digital display and precise readings, a digital multimeter ensures accurate diagnostics.
Whether you’re a professional mechanic or a DIY enthusiast, mastering the use of this tool can save time and money on repairs. Knowing how to properly use a digital multimeter will enhance your ability to maintain and fix your vehicle efficiently.
Choosing The Right Multimeter
There are two main types of multimeters: analog and digital. Analog multimeters have a needle that moves. Digital multimeters show numbers on a screen. Digital ones are more accurate and easier to read. Analog ones are cheaper but less precise.
Auto-ranging helps find the correct range automatically. Backlit screens are useful in dark areas. Durability is important for tough jobs. True RMS provides accurate readings for AC signals. Safety ratings ensure the device can handle high voltage. Data hold allows you to freeze the reading on the screen.

Safety Precautions
Ensure proper use of an automotive digital multimeter by wearing protective gear and checking for damaged components. Always disconnect the battery before testing to prevent electrical hazards.
Personal Safety Gear
Always wear safety goggles to protect your eyes. Gloves help to keep your hands safe from electric shocks. Closed-toe shoes are also important to protect your feet. Wearing long sleeves can add an extra layer of safety.
Proper Handling Techniques
Always hold the multimeter by its body, not the probes. Do not touch the metal parts of the probes. Make sure the multimeter is set to the correct measurement mode. Keep your work area clean and dry to avoid accidents. Always disconnect the power source before changing settings. Double-check all connections before taking any measurements.
Basic Functions
Turn the dial to the voltage setting. Connect the black lead to the ground or negative terminal. Touch the red lead to the positive terminal. Read the voltage on the display. Ensure the leads are connected properly for an accurate reading. Use caution to avoid electric shocks.
Set the multimeter to the current setting. Insert the black lead into the COM port. Insert the red lead into the appropriate current port. Break the circuit and connect the leads in series. Read the current on the display. Reconnect the circuit after measuring. Always double-check connections to avoid errors.
Advanced Functions
Use the multimeter to check if a circuit is complete. Set the multimeter to the continuity mode. Connect the probes to both ends of the circuit. If the circuit is complete, you will hear a beep. This means electricity can flow through. If there is no beep, the circuit is broken. This test helps in finding broken wires or components.
To check resistance, set the multimeter to the ohms setting. Touch the probes to both ends of the component. Read the value on the screen. Lower numbers mean less resistance. Higher numbers mean more resistance. This test helps to know if a component is working well.
Battery Testing
First, switch your multimeter to the DC voltage setting. Next, connect the red probe to the battery’s positive terminal. Connect the black probe to the battery’s negative terminal. The multimeter will display the battery’s voltage. A healthy car battery reads around 12.6 volts. A reading below 12.4 volts indicates a weak battery. If the reading is below 12 volts, the battery may be faulty. Charge the battery fully before testing again.
Set your multimeter to the lowest DC voltage range. Connect the red probe to the battery’s positive terminal. Connect the black probe to the battery cable terminal. Start the engine and watch the voltage reading. A reading above 0.5 volts means there’s a problem. High voltage drop indicates resistance in the circuit. Clean the terminals and retest if needed.
Diagnosing Electrical Issues
Short circuits can cause many problems in a car. To find them, use a digital multimeter. Set it to the continuity mode. Touch the probes to the wires. A beep means there is a short circuit. No beep means the wire is fine. Check all the wires in the problem area. Beeping means you found the short.
Faulty components make cars act strange. Use the digital multimeter to test them. Set the multimeter to the resistance mode. Touch the probes to the component’s terminals. Compare the reading to the normal range. If the reading is too high or low, the component is faulty. Replace any faulty components. This will make the car run better.
Maintenance Tips
Store your digital multimeter in a cool, dry place. Keep it away from direct sunlight. Avoid areas with high humidity. Use a protective case for extra safety. This prevents dust and damage.
Calibrate your multimeter every six months. This ensures accuracy. Use a trusted service for calibration. Follow the user manual for details. Calibration helps in precise readings.
Troubleshooting Guide
Readings can be wrong because of dead batteries. Replace the batteries in the multimeter. Loose connections can also cause errors. Ensure all connections are tight. Check the leads for any signs of damage. Damaged leads can give false readings.
Use the correct settings on your multimeter. Set it to the right measurement type. Double-check your leads before starting any test. Always start with a visual inspection. Look for obvious issues. This can save time.

Frequently Asked Questions
What Is An Automotive Digital Multimeter?
An automotive digital multimeter is a tool used to measure electrical values. It helps diagnose electrical issues in vehicles. It’s essential for troubleshooting car electronics.
How Do You Set Up A Digital Multimeter?
To set up a digital multimeter, first, choose the correct measurement mode. Connect the probes to the appropriate ports. Ensure your multimeter is calibrated.
Can A Digital Multimeter Test Car Batteries?
Yes, a digital multimeter can test car batteries. Set it to measure voltage. Connect the probes to the battery terminals. Read the voltage displayed.
Why Use A Multimeter In Automotive Diagnostics?
A multimeter helps identify electrical issues in vehicles. It measures voltage, current, and resistance. This tool simplifies troubleshooting and ensures accurate diagnostics.
Conclusion
Mastering your automotive digital multimeter boosts your car maintenance skills. Follow our guide to ensure accurate readings. Practice regularly to build confidence. Your vehicle will thank you for the precise diagnostics. Stay safe and keep your multimeter handy for any electrical troubleshooting.
Happy diagnosing and enjoy smooth rides!